Operation
The  Operation tab in RigGuide is where you see and manage the specific steps of a procedure. It helps users follow a clear structure, ensuring that each task is carried out in the correct sequence. This tab is essential for safe, consistent, and well-documented operations.
How it looks
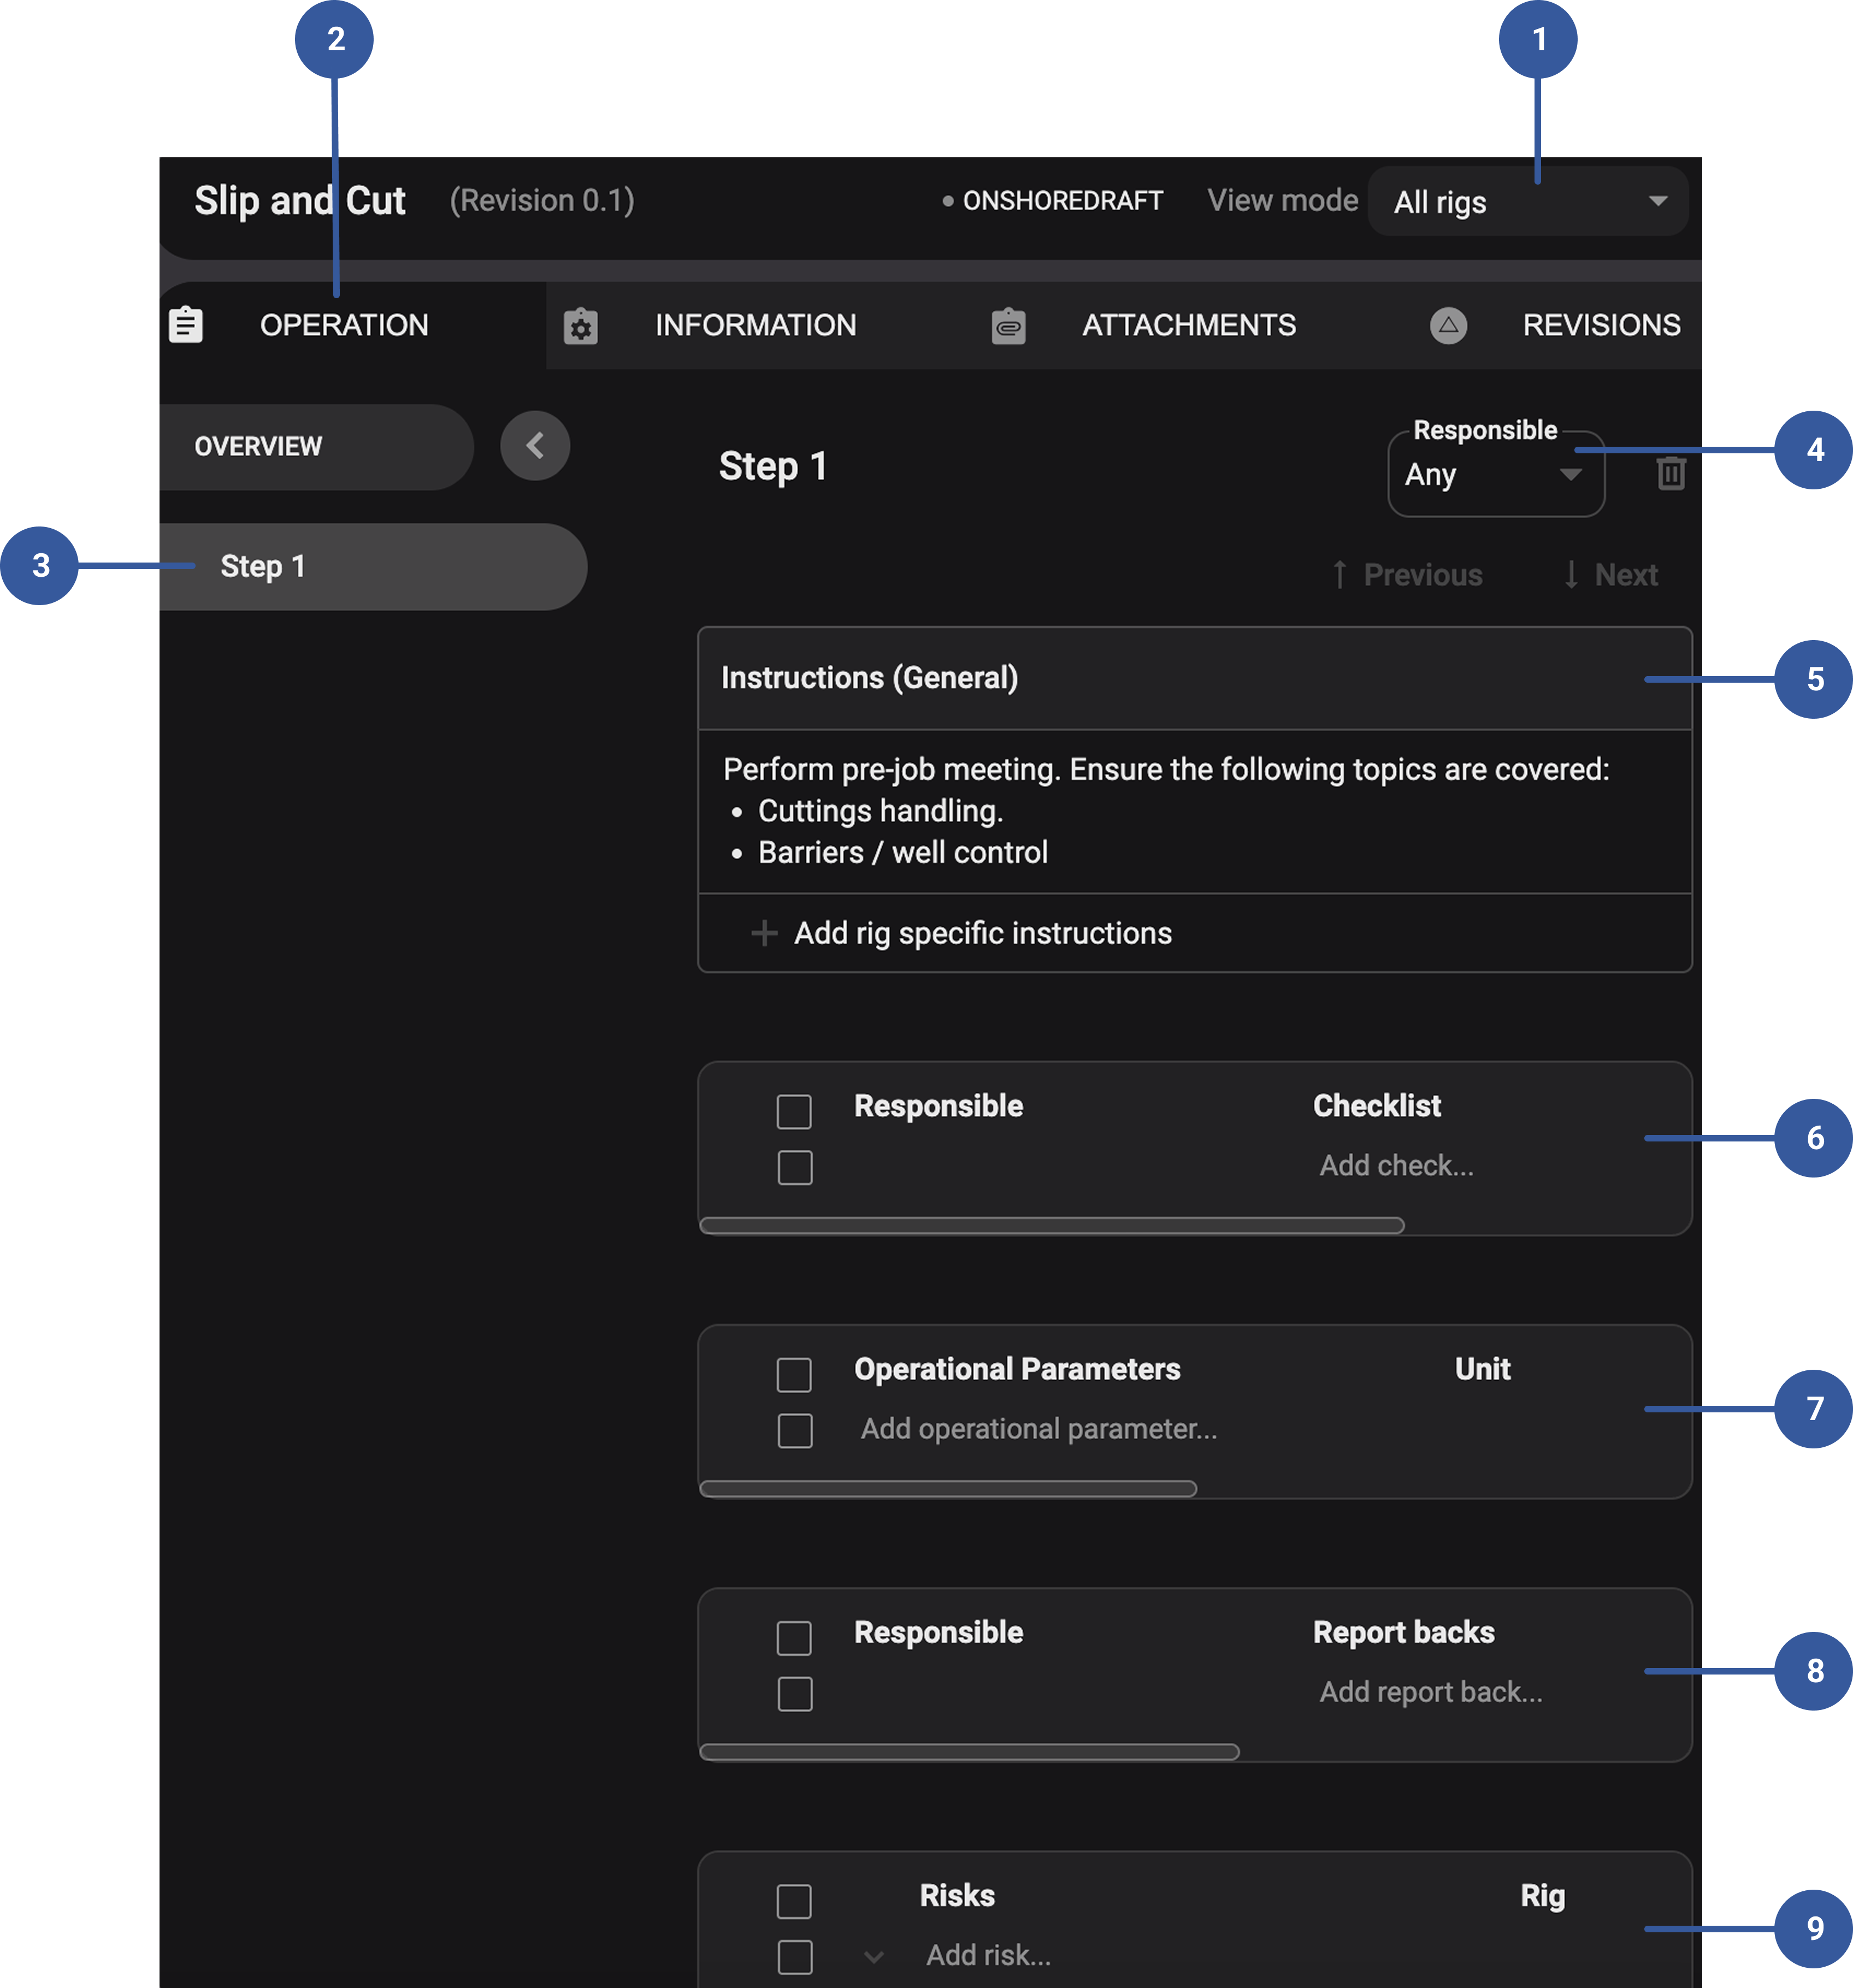
View mode: Lets you choose whether to display the procedure for a specific rig or for all rigs. When a rig is selected, only the rig-specific information is shown.
- Operations tab: One of the main tabs available when creating or editing a procedure. The layout is built around steps, each displayed as a structured block with specific fields.
Steps list: Shows all the steps in the procedure in order. You can click on any step in the list to jump directly to it.
Step Responsible: A dropdown field that lets you assign responsibility for the step. It can be a specific job role (e.g., Driller, ET, Toolpusher) or “Any”, which means anyone with procedure access can complete it.
Instructions field: The main text area where detailed instructions for the step are entered. Supports formatting such as bold text, bullet points, and numbered lists for clarity.
Checklist: Used to confirm that tasks and responsibilities are completed. Each checklist item includes a short description, the assigned job role, and the rig.
Operational parameters: Defines performance targets and safety limits for the step. Includes fields for unit, target value, minimum, and maximum value.
Report backs: Used when operators must enter data during the procedure. It can be set to number or text input, and units of measurement can also be added.
Risks and mitigations: List potential risks for the step with their corresponding mitigation measures to prevent hazards.
Step-by-step instructions
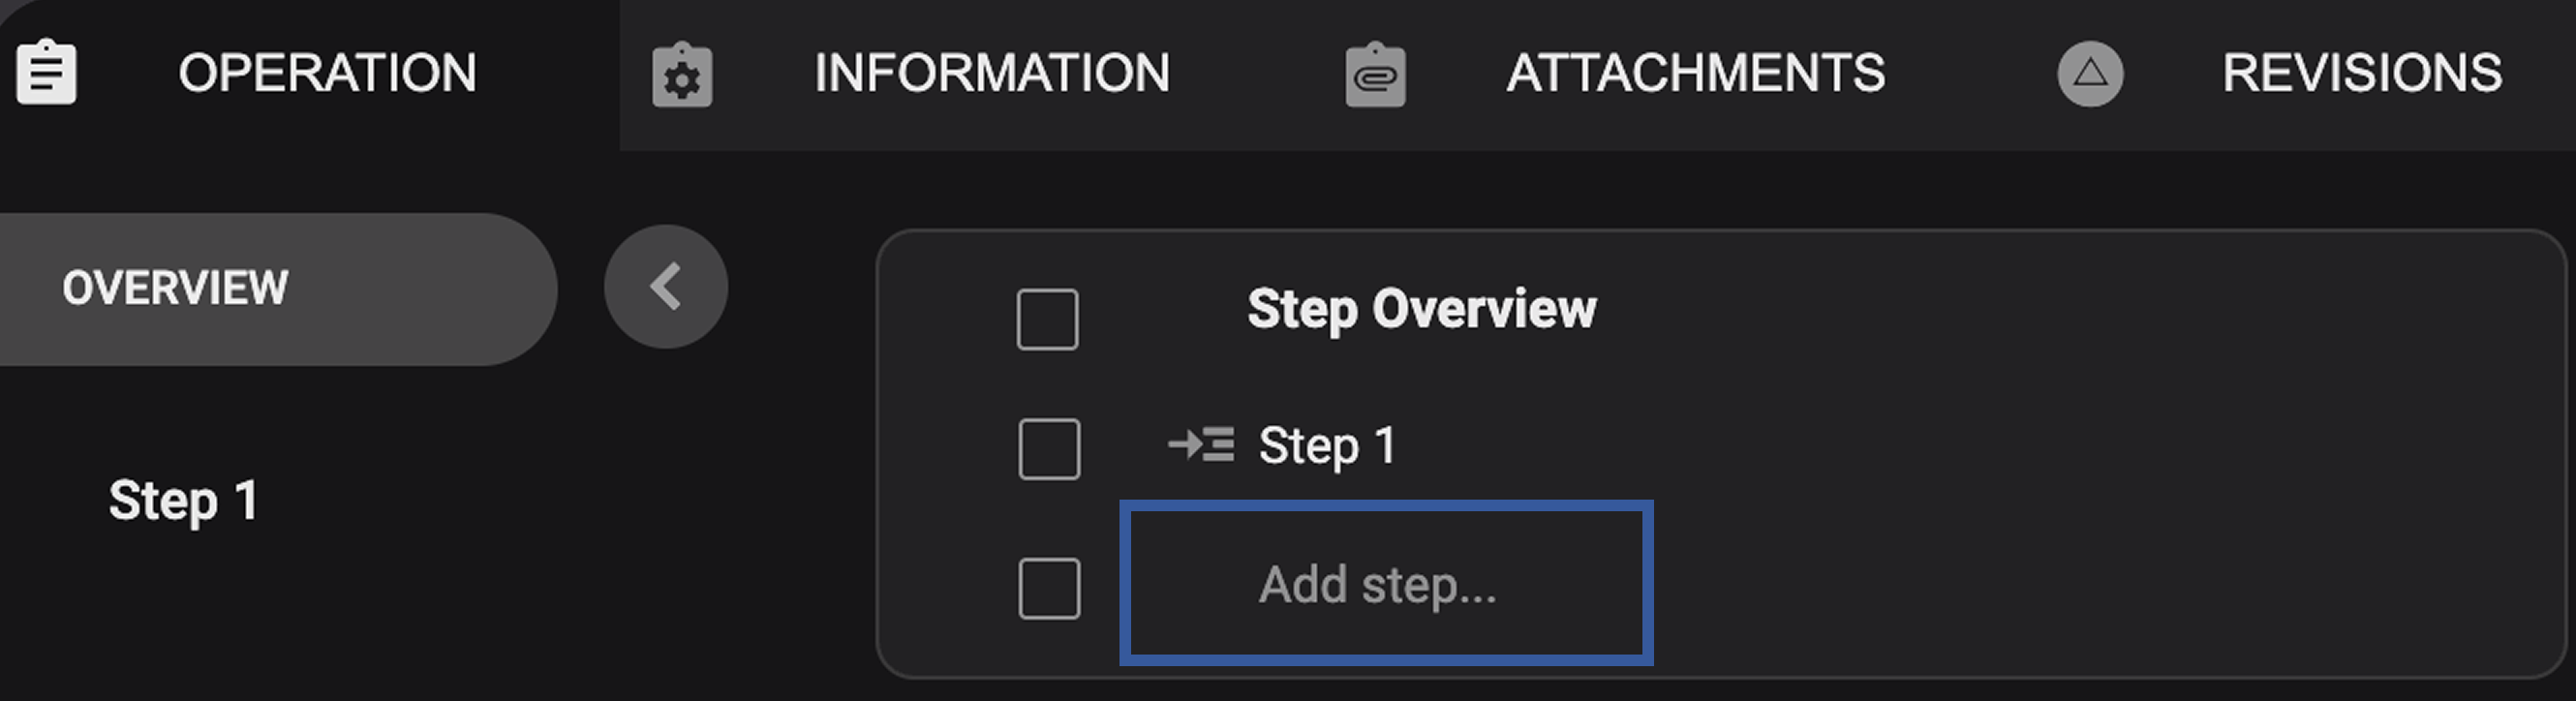
Open the Operation tab: Select the procedure you want to work on and click on Operation to see the step list.
Tip
Make sure you are in the right view mode.
Add a new step: Click to insert a new step and enter a step title.
Write instructions: Open the step and use the instructions field to explain the task. You can format text with the built-in editor.
Create a checklist: Add checklist items for detailed tasks (e.g., equipment checks) and assign each checklist item to a job role.
Set operational parameters: Define units, target values, minimums, and maximums if relevant.
Add report back request: Request data entry (e.g., wind speed, gas levels). Choose whether the input is text or a number.
Document risks and mitigations: Record any safety risks for this step and add instructions for how to mitigate those risks.
Assign responsibility: Select a job role (or "Any") to show who must perform or confirm this step.
Tips and tricks
Always include clear step titles so users can quickly scan the procedure.
Use checklists to prevent missed tasks.
Assign job roles carefully to ensure the right person verifies each step.
Add report back requests when real-time data is critical.
Use risks and mitigations for safety-critical steps.